Plan & Install an Exterior Transom
Exterior Planning 1: Basics and Terminology (Transoms 101)
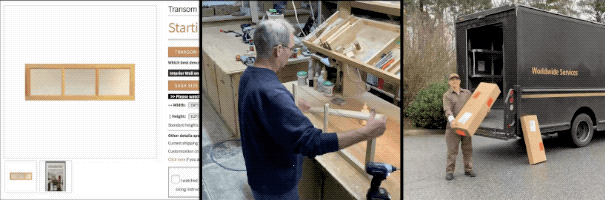
Learn the parts of a transom, how measurements are made, and the role of the jamb for installation. The video uses models of interior transoms for demonstration purposes. Don't worry, all of the information works exactly the same for exterior transoms.
Transoms Direct sells transom window sashes -- that is, wood frames around glass.
- Inside the wood frame, muntins separate glass into decorative panes called lites.
- A transom pattern is the unique combination of the transom's perimeter shape with the design of its interior lites.
- By adding a jamb to a transom you can adapt the thinner transom sash to a thicker wall.
- Not all installations require a jamb.
- If a jamb is required, the assembly of the transom sash with a jamb is called a transom unit.
- When ordering, you specify the width and height of the transom sash only -- not including the jamb. This will become very clear as you watch the planning videos.
Exterior Planning 2: Starting Point and Exterior Differences
Bear with us... if you have explored the planning and installation videos for an interior transom, you no doubt found them very comprehensive. As of the Fall of 2019, a similar set of videos is in production for exterior installations -- but they are not done yet. Luckily, we can use the basic instructions and videos for an interior installation to explain exterior models as well.
Here we will describe the few differences between an exterior and interior installation. You will then be directed to watch the corresponding interior video series to learn how to take your measurements.
For exterior transom installation, your starting point is always a rough opening.
To explain what a rough opening is, let's consider an exterior wall for a moment. On the interior side you usually have drywall, and on the exterior side is the outside of your house. You might think of the outside of your house as brick or siding or even stucco, and that is true when you look at it from the outside. But behind the brick or siding or whatever is a layer of plywood, usually 1/2" thick. This plywood is what is attached to the studs that make up your house's perimeter wall.So let's start on the inside of your house and go through all of the layers until we reach the outside:
- Interior drywall (or plaster or paneling in some cases)
- Wall studs, usually 2x4s or 2x6s
- Exterior wall sheathing, or what we referred to as plywood before
- Finally, the brick, siding, stucco, etc.
If you removed one of the windows from the exterior of your home, you would be able to see a cross section of all of these layers. Obviously you would also get wet if it rains... that is why we fill the hole with a window. The hole that you fill with the window in is a rough opening. All exterior doors, windows, and even transoms need a rough opening to be installed.
Rough openings have a height and width. The height and width for your exterior rough opening will be planned and measured exactly the same as its interior counterpart.
For example, if you watch the installation videos for installing a transom window above an interior door, those same width and height measurements apply to an exterior door as well.
Let's go back to that visualization of removing an exterior window for a moment. With the window removed, you would see that the window has a built-in jamb that adapts the thinner window sash to the thicker, exterior wall. As it so happens, the thickness of that jamb will be equal to a portion of the cross sectional area of the rough opening. Specifically, the window's jamb will be the thickness of the drywall (usually 1/2"), plus the studs (usually 3-1/2"), plus the exterior sheathing (usually 1/2") added together (or 4-1/2" in this example).
Here is the point: jamb thickness for exterior windows and doors (and transoms for that matter) does not include the thickness of the brick, siding, stucco, etc. A piece of exterior trim called brick mould is attached to the outside edge of the jamb to interface with these items.
So, in summary:
- The starting point for and exterior transom installation is always a rough opening.
- Planning for the width and height of a rough opening is exactly the same, interior or exterior.
- Exterior transoms always need a jamb.
- To order a jamb for your transom you will need to know your exterior wall thickness.
- The wall thickness for an exterior wall is the thickness of the "sandwich" comprised of the interior and exterior wall sheathing and the wall studs in the middle.
- Brick veneer, siding or other applied exterior materials beyond the wall sheathing are not counted as a part of wall thickness for purposes of a jamb.
Congratulations! You have learned the main differences between planning for an interior vs. exterior transom.
Exterior Planning 3: Continuing the Planning Process
You are now ready to watch the series of interior planning videos that correspond to the exterior transom you plan to install.
When you click the link below, you will be forwarded to a page that that starts with the Transoms 101 video again. There is no need to watch it twice.
You will also see a video helping you determine your starting point. You can skip that video as well if you like. You know your starting point is a rough opening.
Below both videos you will see a decision box. You should know what to do there, click that your starting point is a rough opening.
Watch all the videos that appear for the rough opening installation. From the videos, you should be able to size the exterior transom that you wish to order.
Here are the links for you to continue with the interior series:
- Transoms Over a Single or Double Door - transom planning exactly the same
- Transom, by itself, Along a Well - transom planning exactly the same
- Transom Over a Window - we send you to the interior door series for this one. Windows and transoms are coordinated together just like a door and transom. The rest you can figure out.
- Transom Above Openings - these are exceedingly rare exterior installations. We send you to the interior "Above an Opening" video series -- which is basically the same thing.
Exterior Planning 4: Ordering
Exterior transoms cn be ordered completely online. Go to the shop section and find a transom pattern you like.
On the ordering page, the first section is "Transom Location." Choose the box that says "Exterior Wall on One Side". That's it. Just enter the sash size you need and move on to the customization section.
If you have something complex like a combination front door unit with sidelites and a transom, call us and we can also walk you through this step-by-step.
PE-TD-2